25 Jan Assembling the Antenna
Tools: 7/16” wrench, Phillips head screwdriver
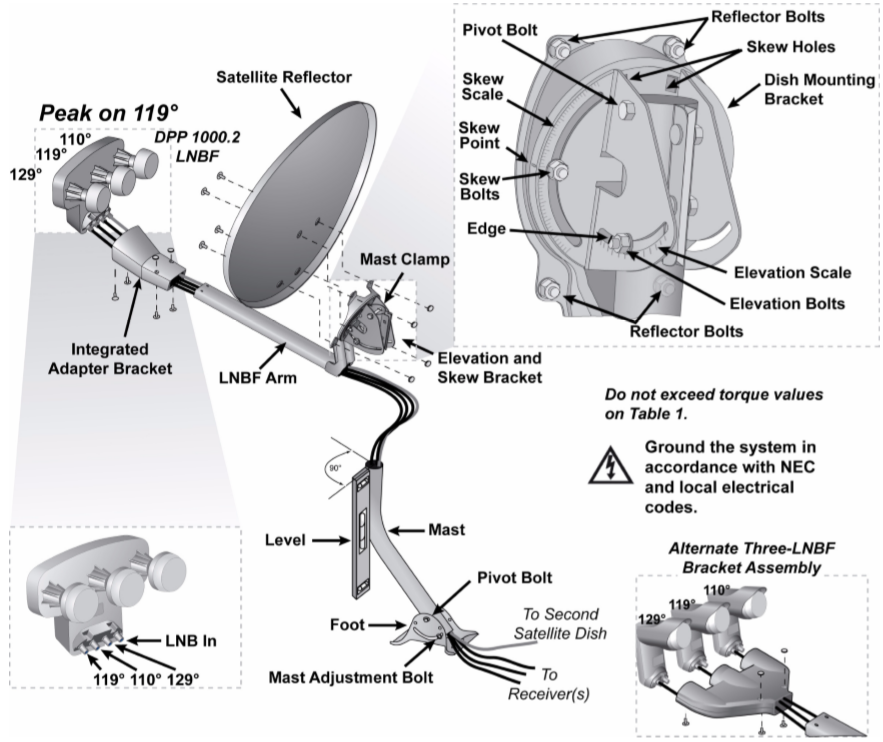
Equipment: 1000.2 reflector and skew plate/arm, mast/footplate, hardware pack, plastic bracket, 1000.2 LNBF, estimated length of prepped messenger cable
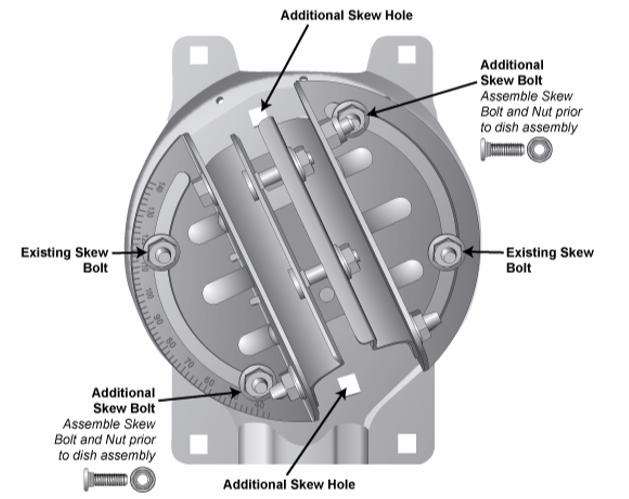
Use additional skew bolts for skew angles greater than 110º or less than 70º.
Dish Assembly:
- Gather and arrange the materials
- Turn the reflector upside down, and empty the hardware pack into the lip of the dish
- Adjust skew and elevation on the skew plate using the 7/16” wrench
- Add two additional skew bolts/nuts to the skew plate for skew angles greater than 110º or less than 75º
- Align the skew plate on top of the reflector
- Insert reflector bolt into the hole on the reflector and push it through both the reflector and the skew plate
- Attach a nut and tighten it by hand
- Repeat the process for the remaining three holes
- Tighten all four nuts using the 7/16” wrench
- Feed the cable through the arm
Bracket Installation:
- Align the posts inside the plastic LNBF bracket with the holes on the arm
- Hold the bracket together on the arm using one hand
- Hold a hex nut in place on the bracket with your finger
- The Slimline bracket comes with hex nuts installed
- Insert a bracket screw and tighten it using the screwdriver
- Repeat the process for the remain screw
LNBF Installation:
- Take out the 1000.2 LNBF
- Attach the messenger cable to the LNBF
- Do not connect cable to LNB-in
- LNB-in is used when installing a wing dish
- Not a common installation type
- Torque to 30 inches per pound using torque wrench
- Align the LNBF with the plastic bracket
- Insert two of the remaining LNBF screws and tighten using the screwdriver
- The last screw is used if installing a W bracket with three single LNBFs